Notion PARA Template — Projects, Areas, Resources, Archives
Have you ever felt overwhelmed by the number of tasks, projects, and resources you need to keep track of? Do you struggle to stay organized and find yourself constantly switching between different tools and apps? If so, you're not alone. Fortunately, there's a solution that can help you streamline your workflow and keep everything in one place: the PARA method.
Basically, it’s a framework developed by productivity expert Tiago Forte that helps you organize your life into four distinct categories: Projects, Areas, Resources, and Archives. By dividing everything up into these four categories, you can create a system that's easy to use, flexible, and customizable to your needs.
Benefits of the PARA Method
Tiago Forte’s method offers several benefits that will make you stay organized and productive:
Clear Organization
One of the biggest benefits is that it provides a clear and organized structure for everything in your life. By dividing everything up into four distinct categories, you can easily find what you're looking for and stay on top of your tasks.
Increased Productivity
Another benefit is that it can increase your productivity. By having a clear structure and a way of organizing your tasks and projects, you can stay focused and avoid getting distracted by non-essential tasks.
Customizable to Your Needs
The PARA method is also highly customizable to your needs. You can adapt it to fit your unique work style and preferences, and you can add or remove categories as you go.
How to Build a Notion PARA System
Notion is a powerful tool that is perfectly suited for this use case. Here's how to get started:
1/ Projects
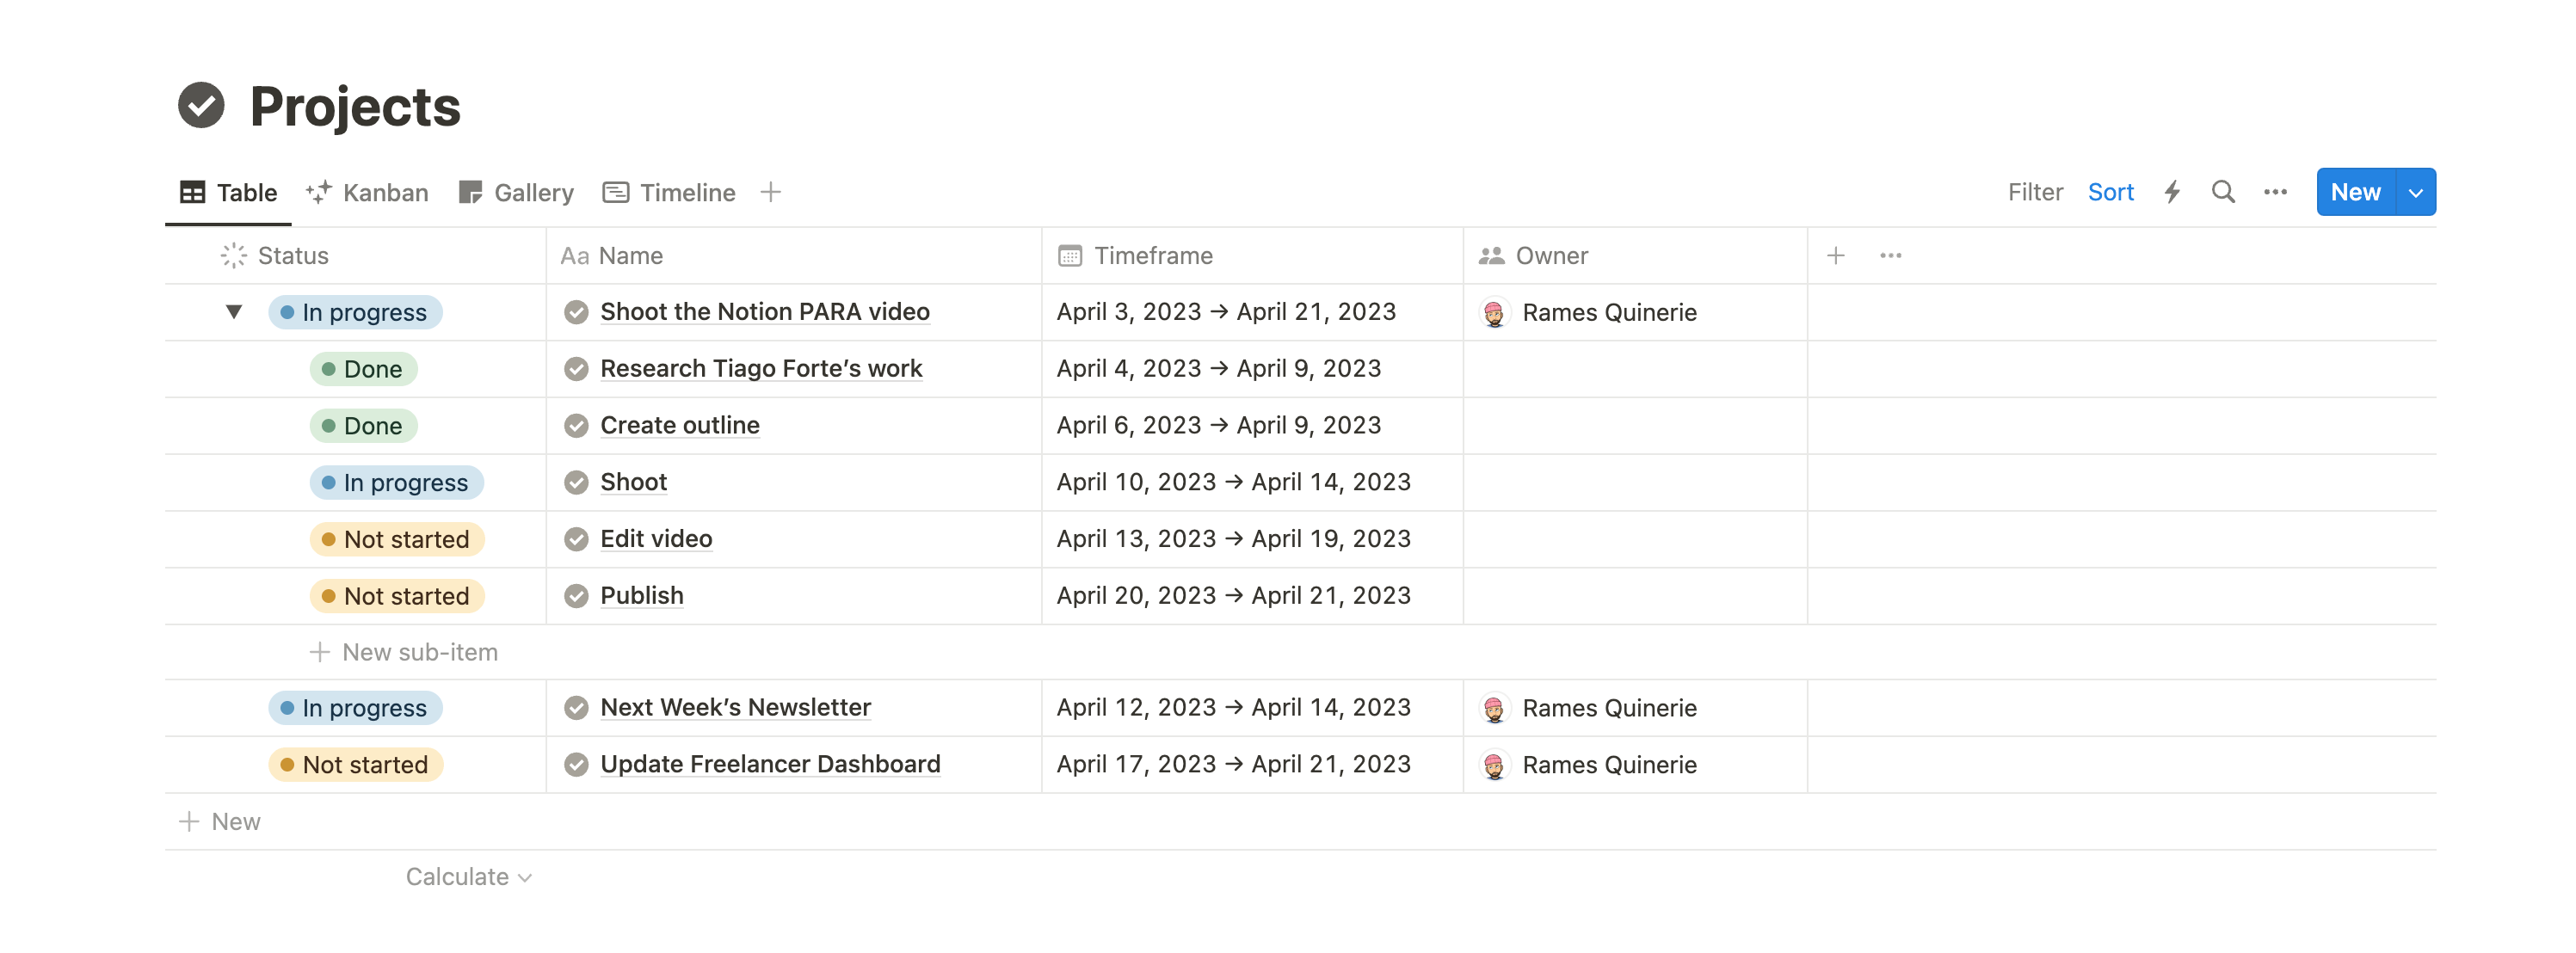
To build this framework in Notion, the first step is to create a Projects database. It helps you keep track of all your active projects and will be linked to Areas and Resources databases. Required properties include:
- Project name
- Timeframe
- Status
- Relation to Areas
- Relation to Resources
Optional properties may include:
- Person (if you work with other teammates)
- Sub-items (can act as tasks)
- Relation to other databases (e.g. "Invoices")
Views
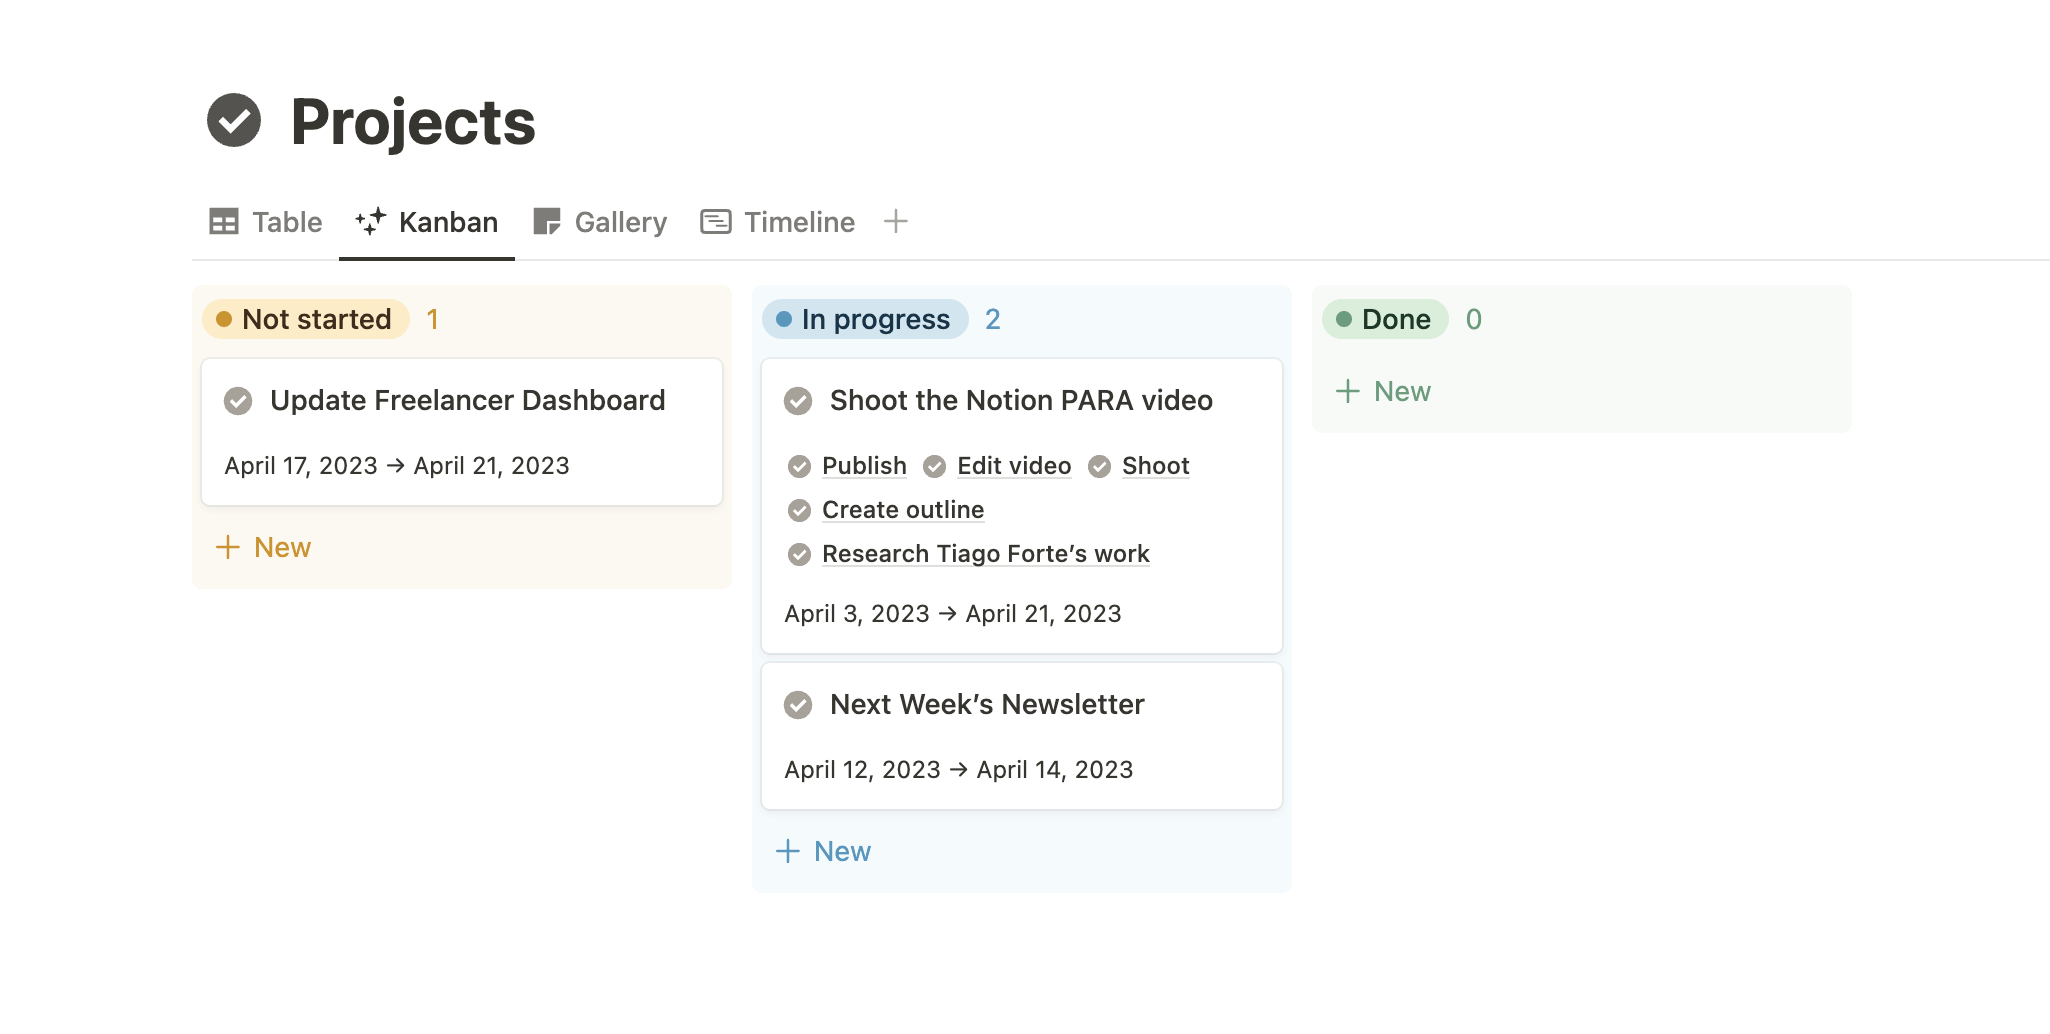
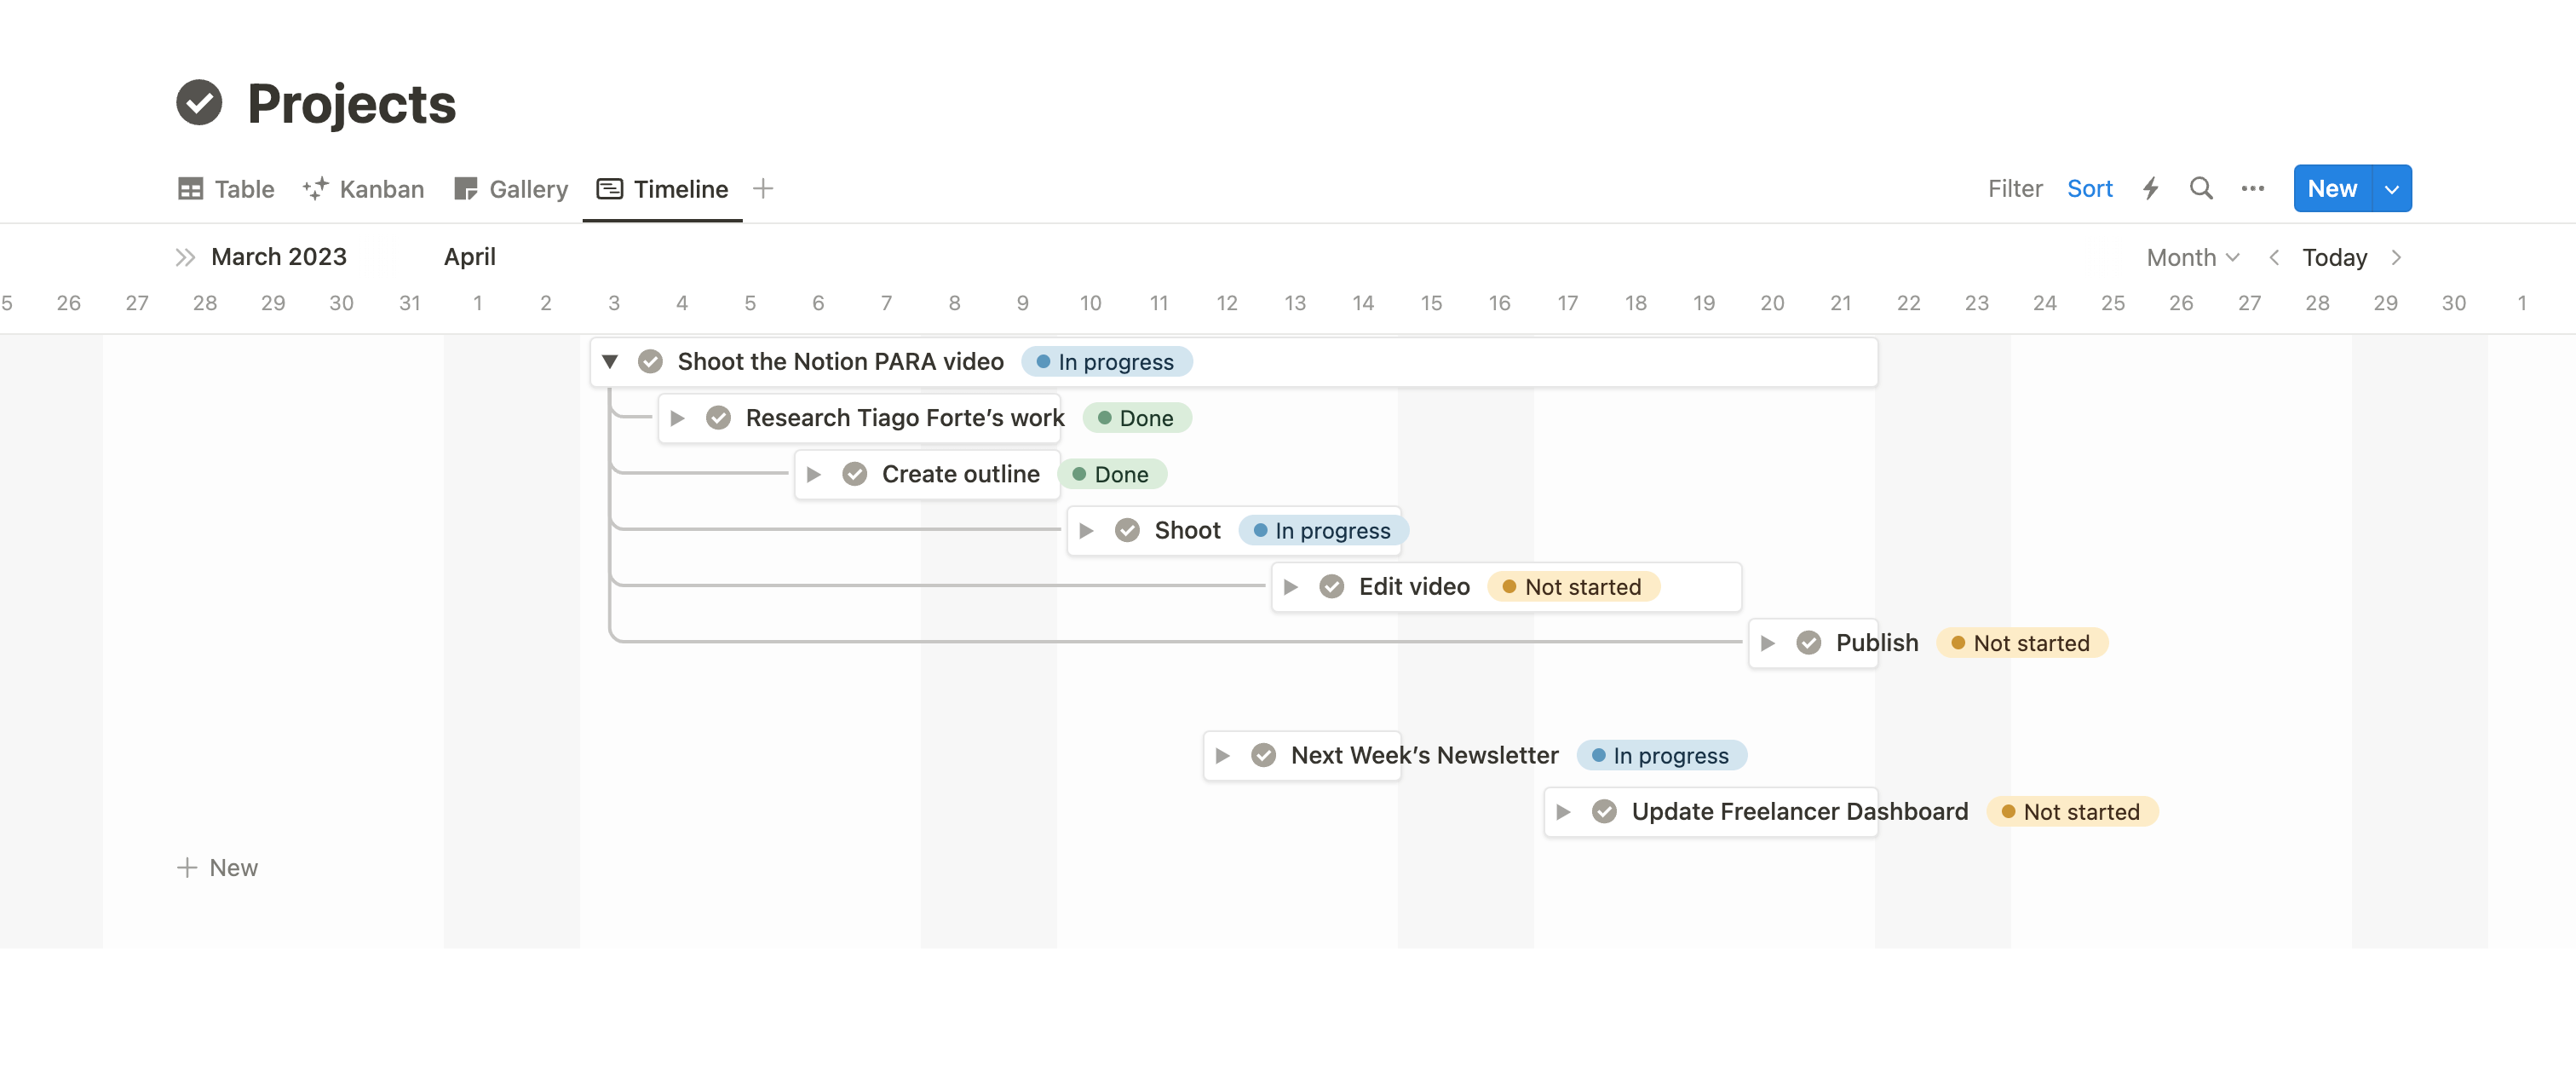
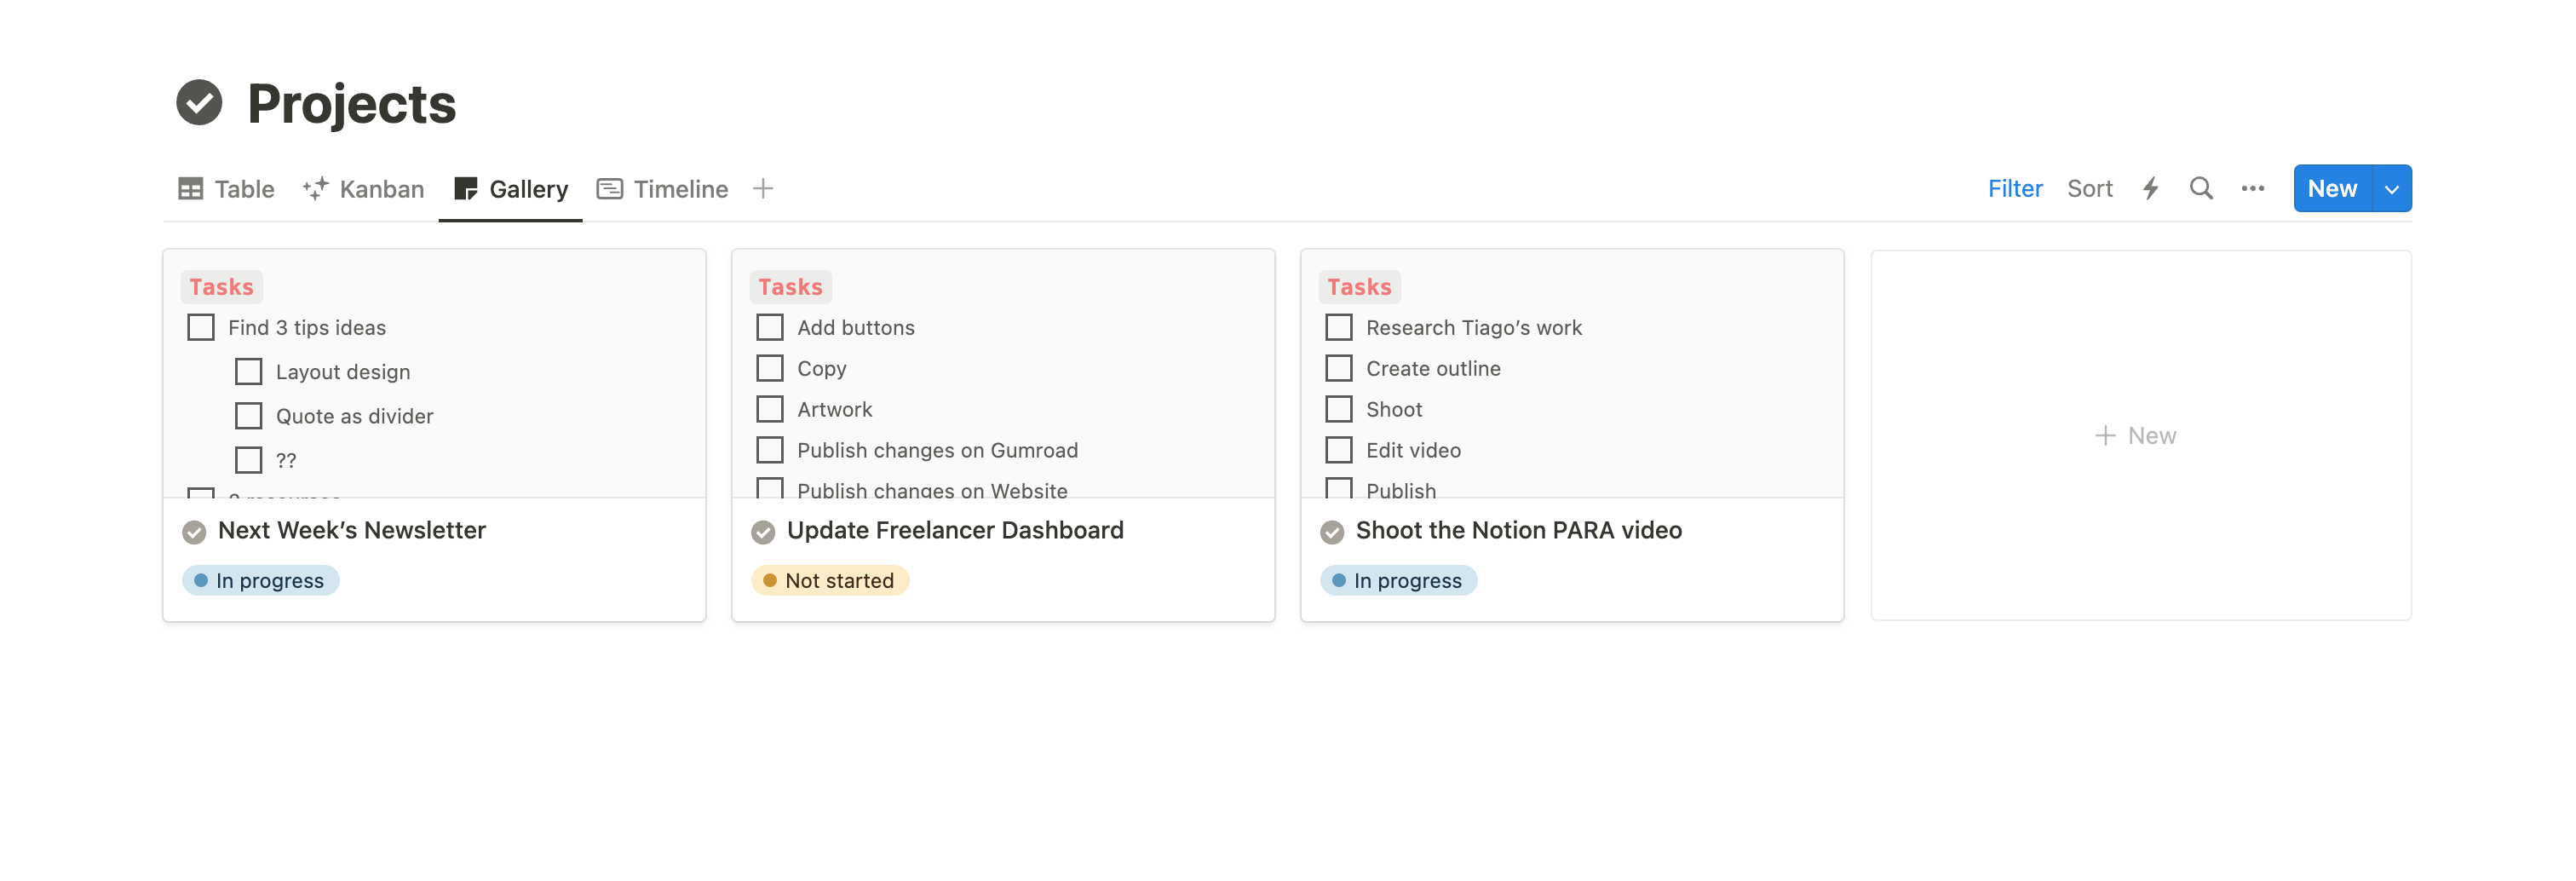
I strongly recommend implementing multiple views, testing them for a few weeks, and then deciding which ones you use most. You can try a Gallery view that displays your most important properties, a Calendar view to envizion everything over time, a Board view grouped by status to follow progress, a Timeline view if you use sub-items (very useful when it comes to making dependencies), or a simpler table or list view (in that case, I recommend grouping the database by status).
Table view
Board view
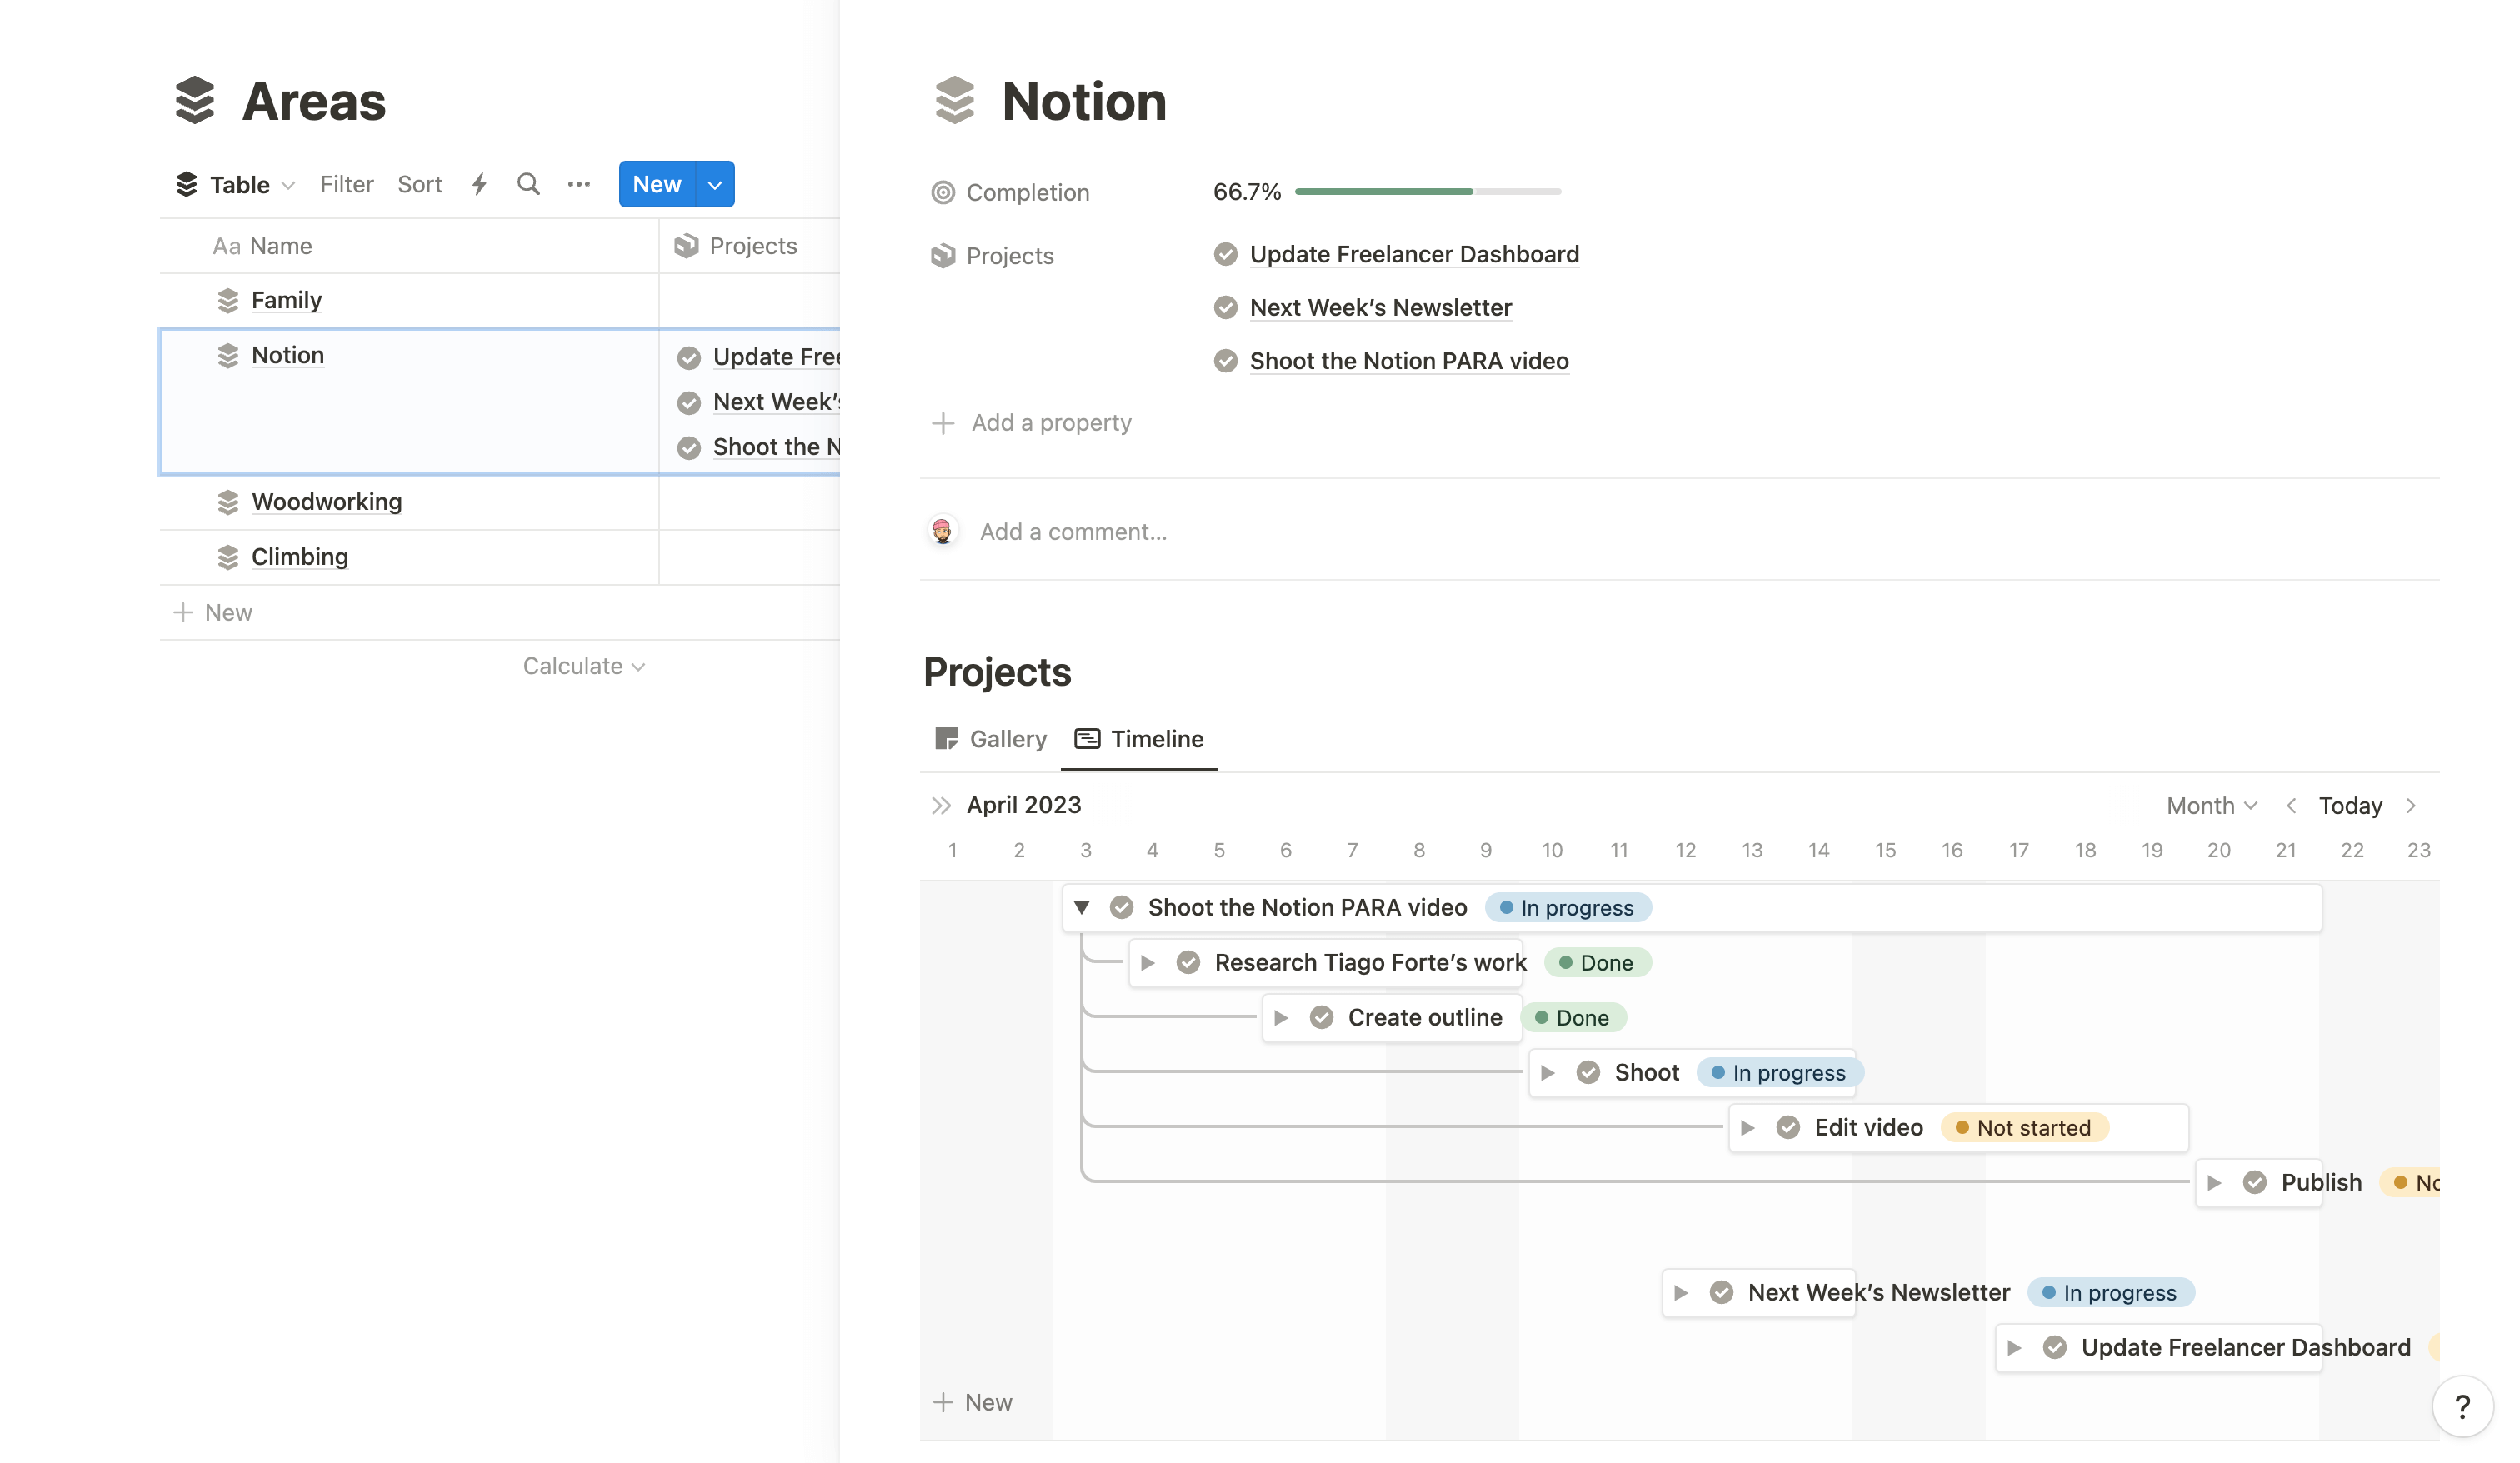
Timeline view
Task Management
Tiago Forte’s framework does not include a specific task management feature, but there are three options for incorporating them:
- Use simple checkboxes inside each project's card. These will be visible in the Gallery view.
- Use sub-items, which function similarly to parent projects and can utilize the same properties, such as in the Table and Timeline views. The Timeframe property can be used for the deadline for these tasks.
- Build an additional tasks database and link it to Projects. You can also implement a self-referential filtered linked view of the tasks database inside the parent item.
I would recommend option 3 as it gives the more flexibility, but it’s also the more complex. If you’re looking for something simple yet efficient, feel free to use option 1 or 2.
Archiving
If you want to get rid of a project because it's no longer relevant or was completed a long time ago, drag and drop it into the Archives database. More information on that is provided below.
2/ Areas
The next step is to create Areas, which refer to the different zones of responsibility in your life, such as work, personal life, hobbies, etc. It's a way to categorize and organize all the different aspects of your life that require your attention and action. By having a dedicated database for Areas in Notion, you can keep track of all the tasks, projects, and notes related to each area in one place.
First, define your different areas. Most common ones include:
- Work
- Health
- Relationships
- Hobbies
However, feel free to customize it as you wish.
Now you can build your database. Keep it simple by adding only relevant properties. Then, build a template where you'll be linking self-referentially filtered views of your "Projects" and "Resources" database. This ensure that when you create a new area, you'll instantly have access to all related Projects and Resources.
Self-referential filter guide
- Create your Areas database and link it to Projects (with a relation property)
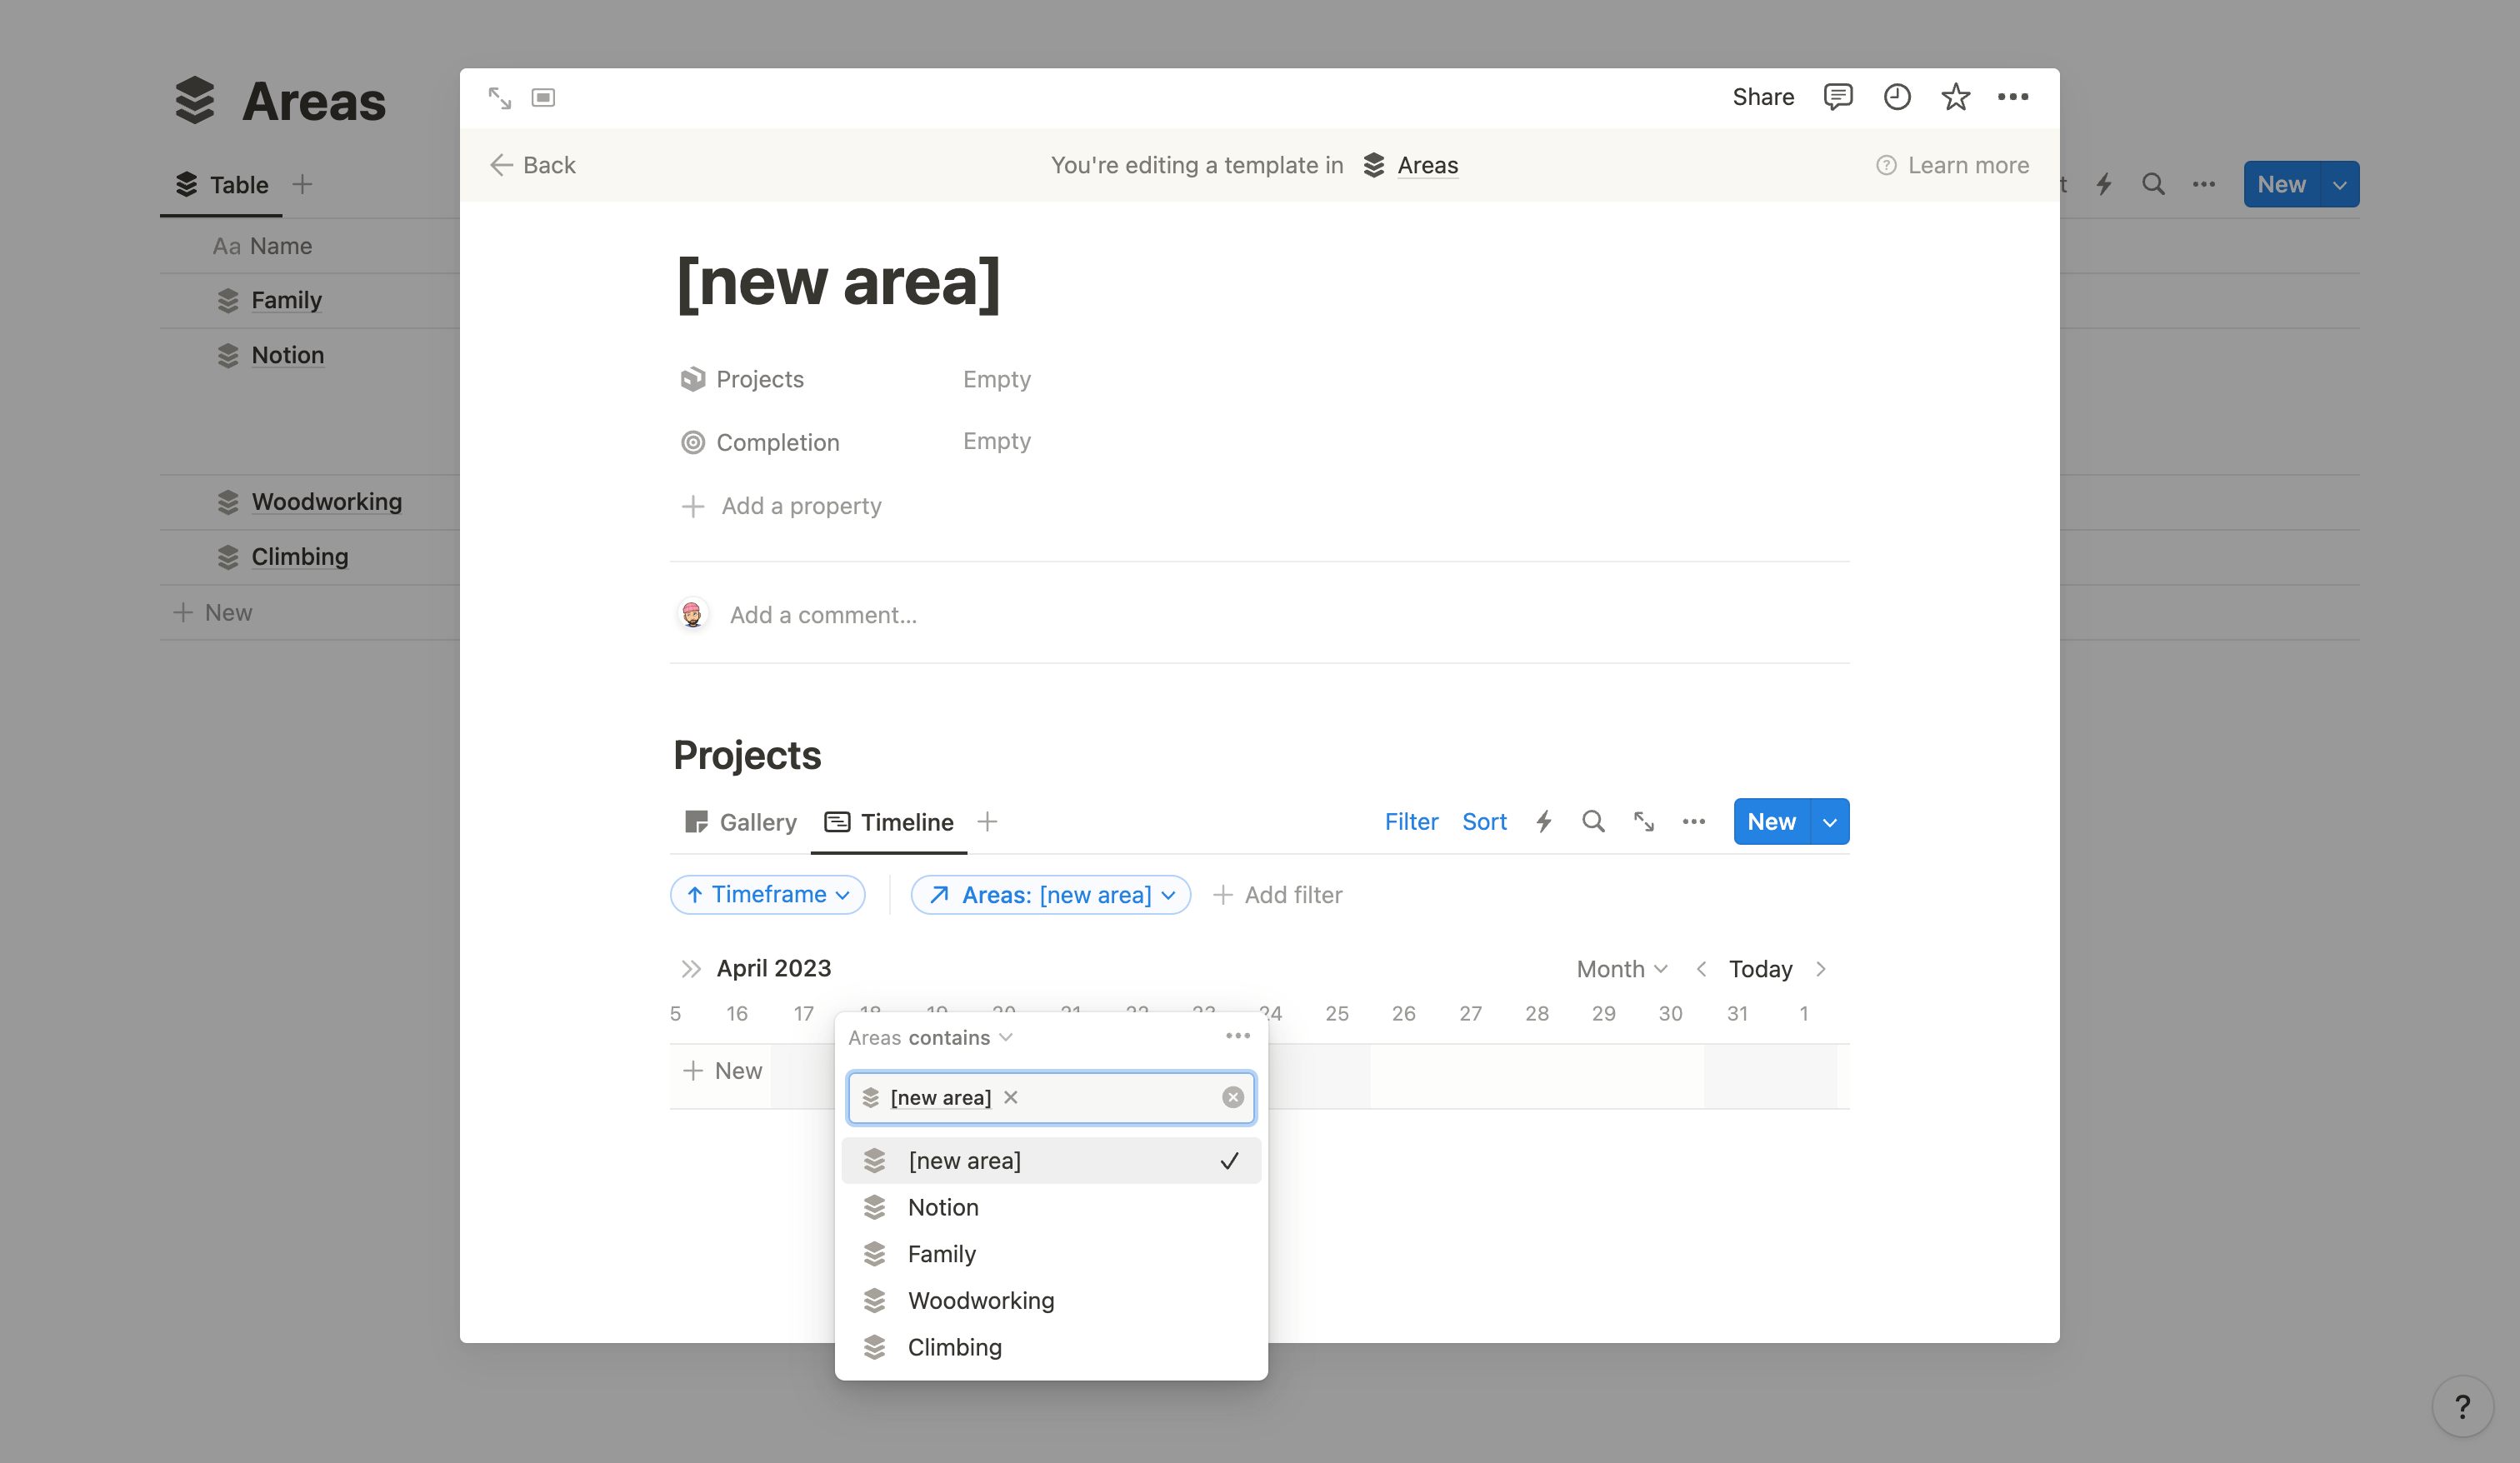
- Add a new template in Areas and name it something like "[new area]"
- Inside this template, add linked views of your Projects database (you can add as many views as you wish)
- Click "Filter," select "Areas" (the relation property), and filter by Area contains [new area].
That's it! Repeat the same operation with a linked view of Resources, and you're good to go. You can now select this template as the default one and start adding your first Areas.
Pro tip: You can use columns to have your Projects database on the left and your Resources database on the right.
3/ Resources
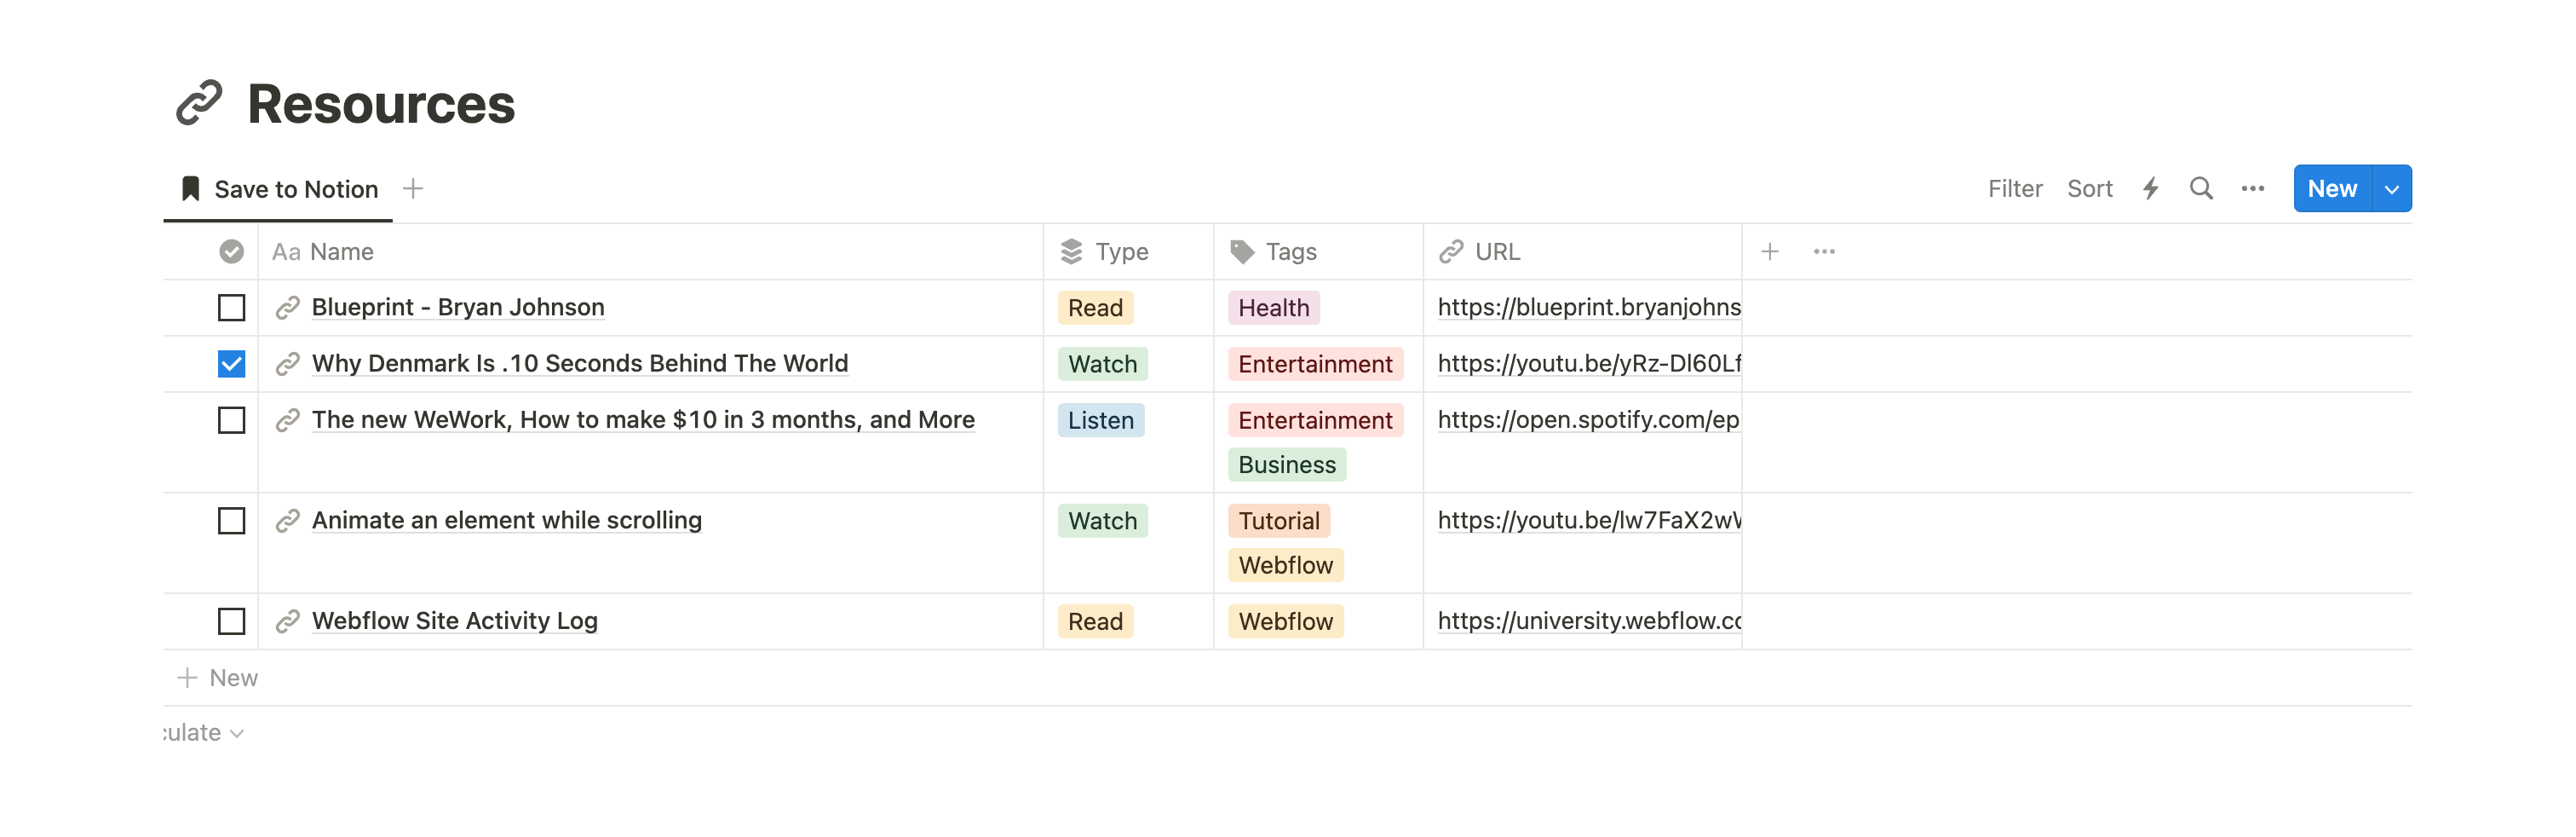
Resources is where you store all your reference materials, such as books, articles, and websites. This can include anything you might need to refer to later on, whether for personal or professional purposes. Having a dedicated database for resources in Notion allows you to keep all your reference materials in one place and easily access them when needed. This can ensure that you stay organized and save time searching for information across different sources. You can think of it as your personal library.
I strongly suggest you read my blog post Save Links to Notion, where I explain how to build your "Content" database (which, in your case, will be your Resources database) and how to use Notion's Web Clipper to save all your links.
Once you're done, don't forget to add it to the [new area] template, if you haven't already.
4/ Archives
Archives is the final category in Tiago Forte's PARA framework. It is where you store all your completed items, as well as any other items that you want to store for future reference. This can include things like old notes, research materials, or documents that you want to keep for historical or reference purposes. By having a dedicated database for Archives in Notion, you can keep all of these items organized and easily accessible when you need them.
I suggest that you keep it as a page, so it doesn't take up too much space (select your database and click "Turn into page"). Whenever you need to archive something, simply drag and drop it onto the page, and it will automatically become a new Archives item. You can then add "Type" or "Topics" properties to better filter and organize the items.
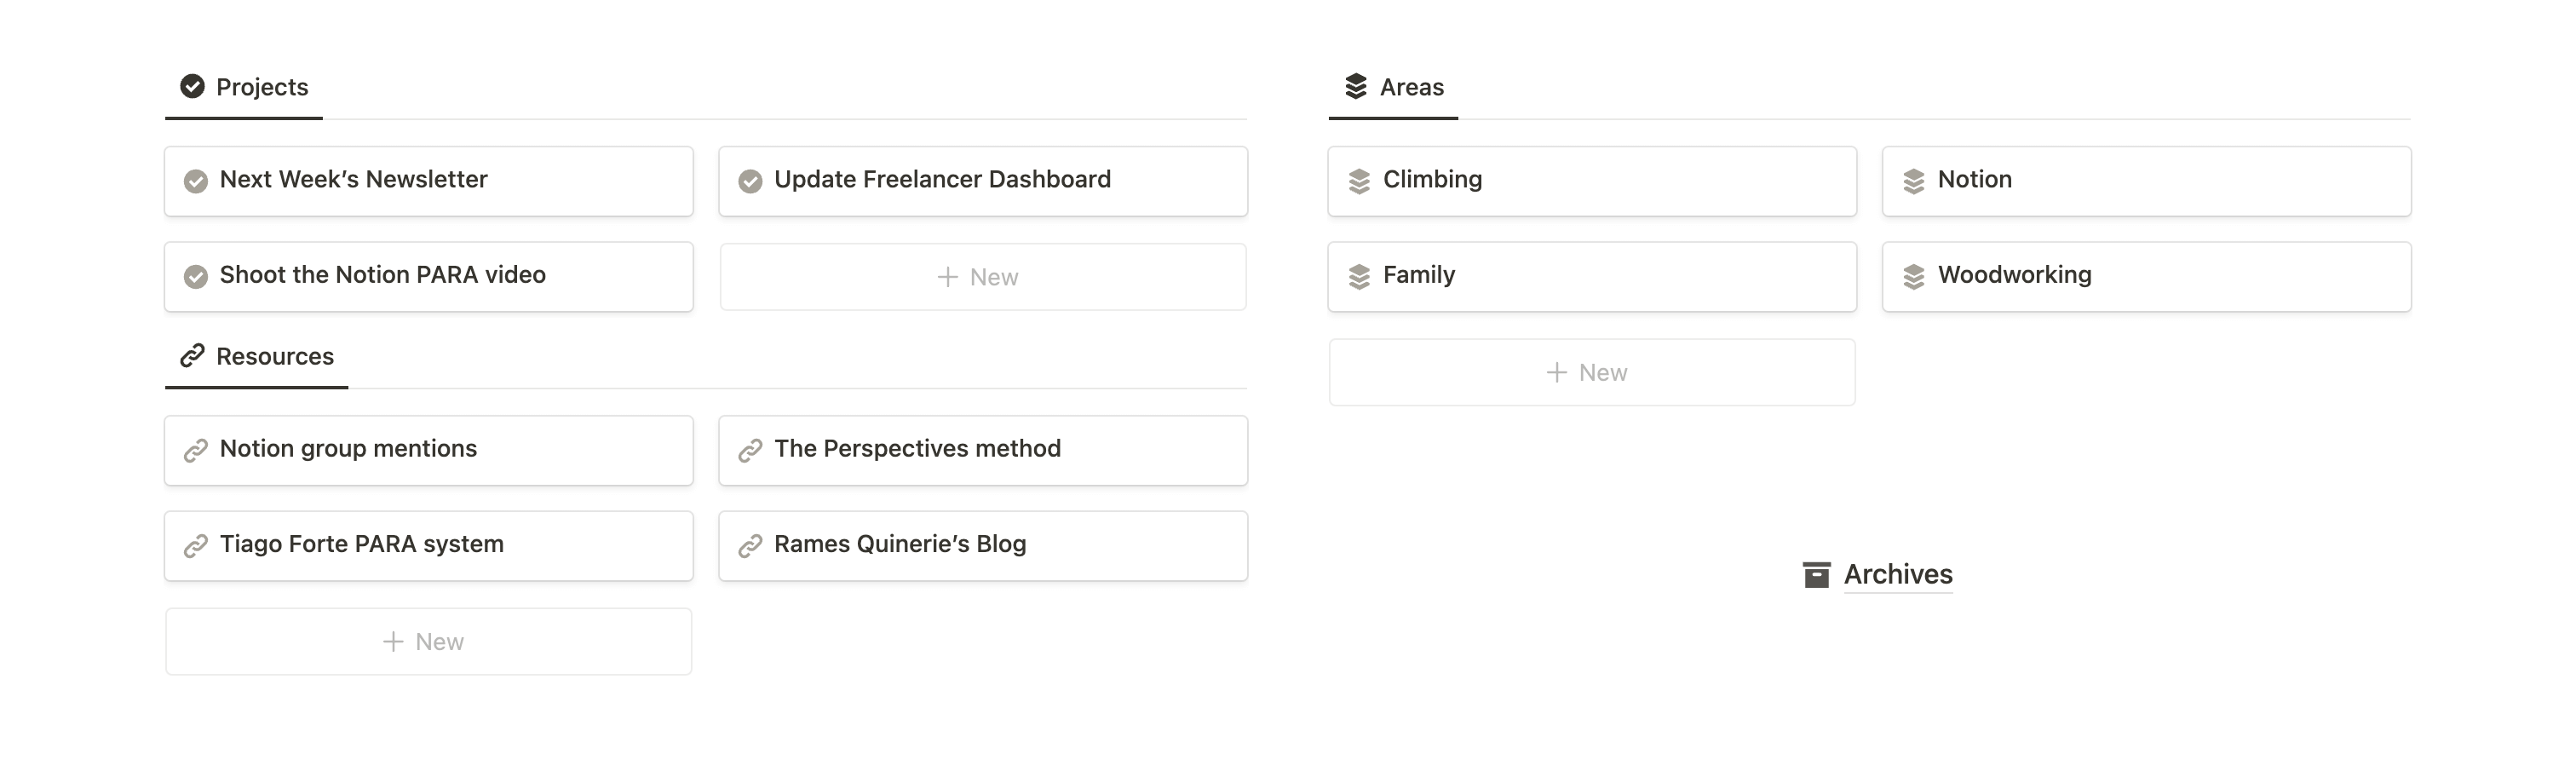
Notion PARA Template Layout
I love minimalistic layouts. For PARA, I suggest using a "square" layout with Projects in the top-left, Areas in the top-right, Resources in the bottom-left, and Archives in the bottom-right. Consider using simple gallery views for each of your databases, with "Card preview" set to "None".
I also suggest you set “Open in side peek” for all the databases — it’s the best option to keep things clear and organized.
This is a very minimal setup. But it should do the work for the majority of what you need. Once you’re comfortable with your system, feel free to add additional views, properties and experiment with new designs.
Conclusion
The PARA method in Notion is a powerful framework that can help you stay organized and productive in your personal and professional life. By dividing everything up into four distinct categories, you can create a framework that's easy to use, flexible, and customizable to your needs. By using Notion to build your PARA system, you can take advantage of a powerful tool that can help streamline your workflow and keep everything in one place.
In addition, if you already use Notion for other personal or business organization purposes, integrating it with your existing pages and workflows is extremely easy.
Start now & create your Notion account 🙃
(#NotionPartner)
The PARA method is a framework developed by productivity expert Tiago Forte that helps you organize your life into four distinct categories: Projects, Areas, Resources, and Archives. By dividing everything up into these four categories, you can create a system that's easy to use, flexible, and customizable to your needs.
The PARA method provides a clear and organized structure for everything in your life, which can enhance your productivity. This framework is also highly customizable, allowing you to adapt it to fit your unique work style and preferences, and you can add or remove categories as you go.
Notion is perfectly suited for implementing the PARA method. You can set up a Projects database to keep track of all your active projects, create Areas to help categorize different responsibilities in your life, store all your reference materials in a Resources database, and organize completed or outdated items in an Archives database. This method helps you streamline your task management and increase your productivity.
Latest posts
Templates that (truly) work